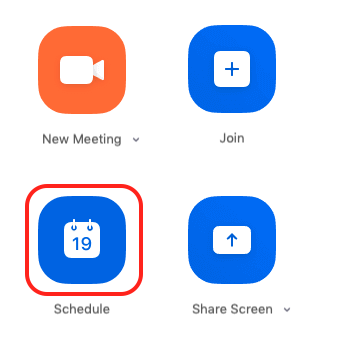
- Open your zoom application and click on the Schedule icon.
- To set up a password check the box left to Require meeting password.

Zoombombing Resources

A new form of trolling in which a participant uses Zoom’s screensharing feature to interrupt and disrupt meetings and classes.
To report any issues of Zoombombing, contact the Stockton Security Operations Incident Response team at information.security@stockton.edu.
How to Prevent Zoombombing
Set a Meeting Password
- Require a Password When Scheduling New Meetings
Require a Password When Scheduling New Meetings
- Require a Password for Instant Meetings
Require a Password for Instant Meetings
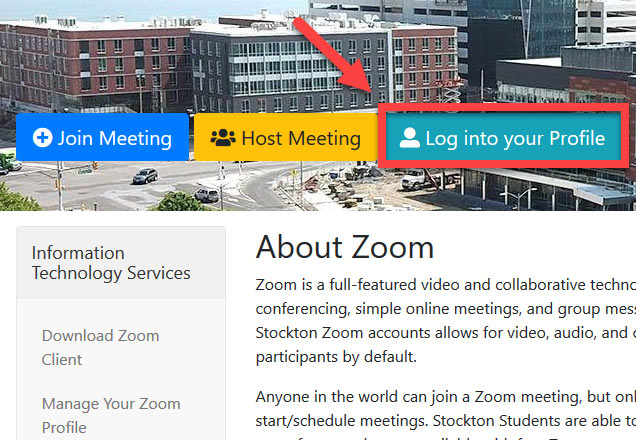
- Go to Stockton's Zoom web portal https://stockton.zoom.us/
- Click on Log into your Profile.
- Click on Settings.
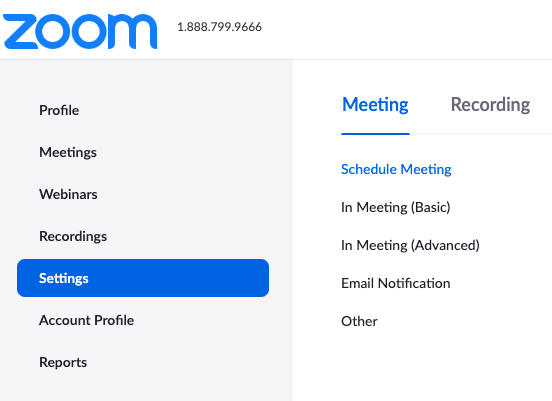
- Navigate to the Meeting tab and scroll down to verify that the password settings that
you would like to use for your account are enabled.
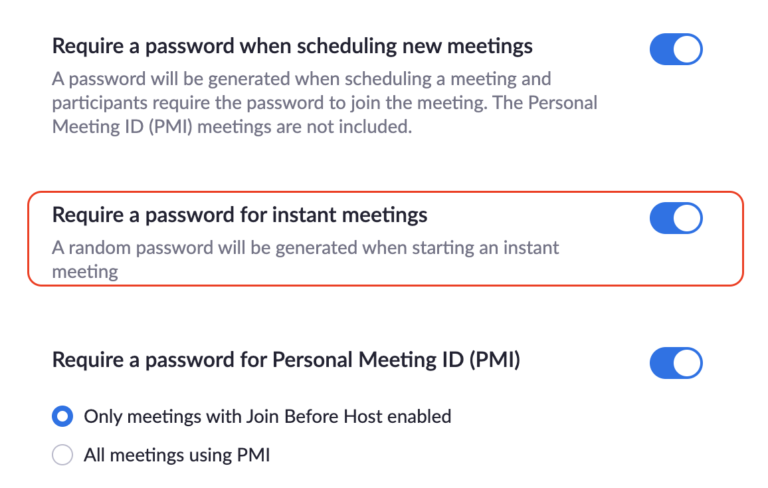
- If the setting is disabled, click the Status toggle to enable it. If a verification dialog displays, choose Turn On to verify the change.
- Go to Stockton's Zoom web portal https://stockton.zoom.us/
- Remove Participants From Class
Remove Participants From Class
Follow the instructions to remove a person from a Zoom meeting.
- Click Manage Participants.
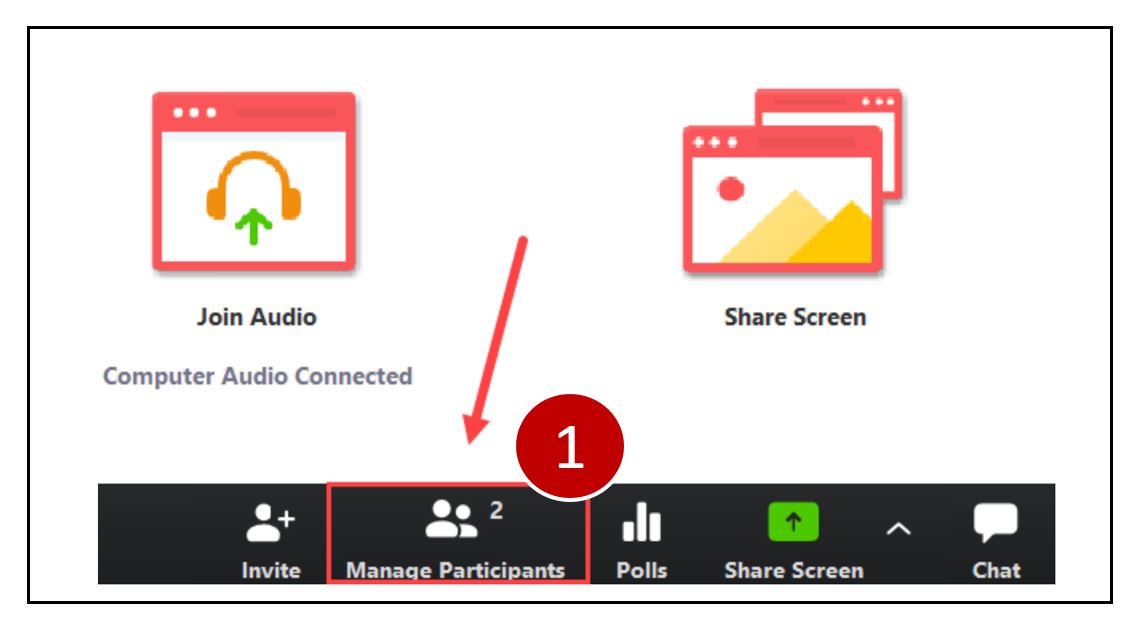
- In the Participants panel, place your mouse over the name of a person and click More.

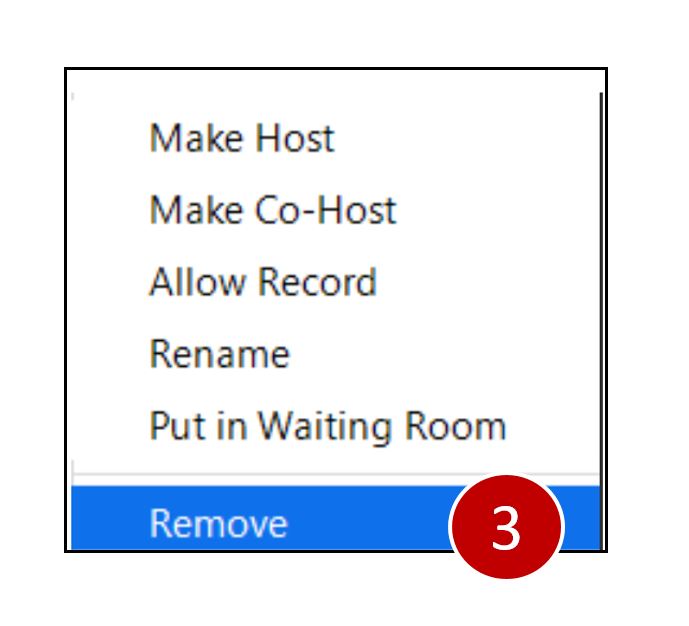
- Click Remove.
If you're using Zoom within Blackboard:
- Set Password and Enable Waiting Room for a Zoom Meeting
Set Password and Enable Waiting Room for a Zoom Meeting
For Blackboard
There are two key features that enable you to further secure your meetings: Set Up Password and Enable Waiting Room. Set Up Password requires a participant to enter a password to enter the meeting. The Waiting Room feature allows you to control when a participant joins the meeting. These features will help prevent “zoombombing” of your classes. As host, you can admit attendees one by one or all at once.
Set Password & Enable Waiting Room in Blackboard
When scheduling a Zoom meeting in Blackboard ensure that you set the following meeting options:
- (a)Select Require meeting password.
- (b)Input a password or accept the randomly generated number from Blackboard.
- (c)Select Enable waiting room.
- (d)Select Record the meeting automatically.
- (e)Select In the cloud.

Start Meeting with Waiting Room
- Start your meeting from the Blackboard and open the Zoom app when prompted.
- As participants join the call, you will see a pop-up message:
- To admit a person directly, click Admit.
- To see all participants in the waiting room, click See waiting room.

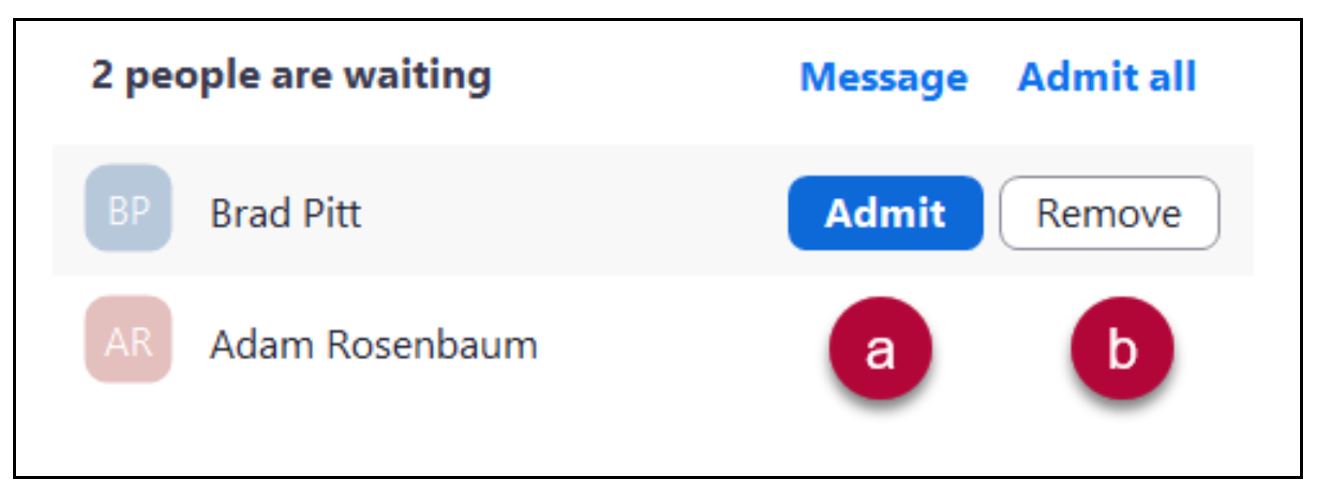
- In the waiting room panel, perform one of the following:
- Click Admit All to admit all participants.
- Click Admit to allow a single participant into the meeting.
- Click Remove to remove a single participant from the Zoom meeting.

Managing a Meeting
Once the meeting has started, the meeting room is still active.
- If you wish to return a participant to the meeting room:
- Click Manage Participants.
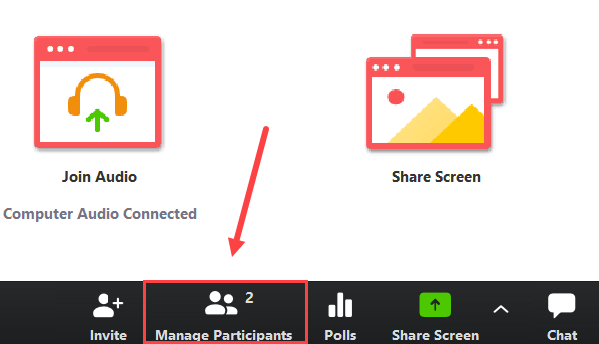
- In the Participants panel, place your mouse over the name of a person and click More.

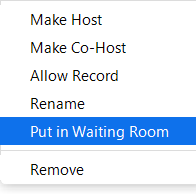
- Click Put in Waiting Room.
- Click Manage Participants.
- If you wish to remove a participant from the meeting.
- Place your mouse over the name of a person and click More.

- Click Remove.
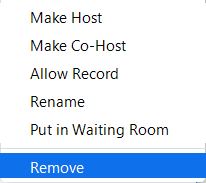
- Place your mouse over the name of a person and click More.
Locking a Meeting
- Lock a Meeting
Lock a Meeting
When you lock your meeting, no additional participants are able to enter your class.
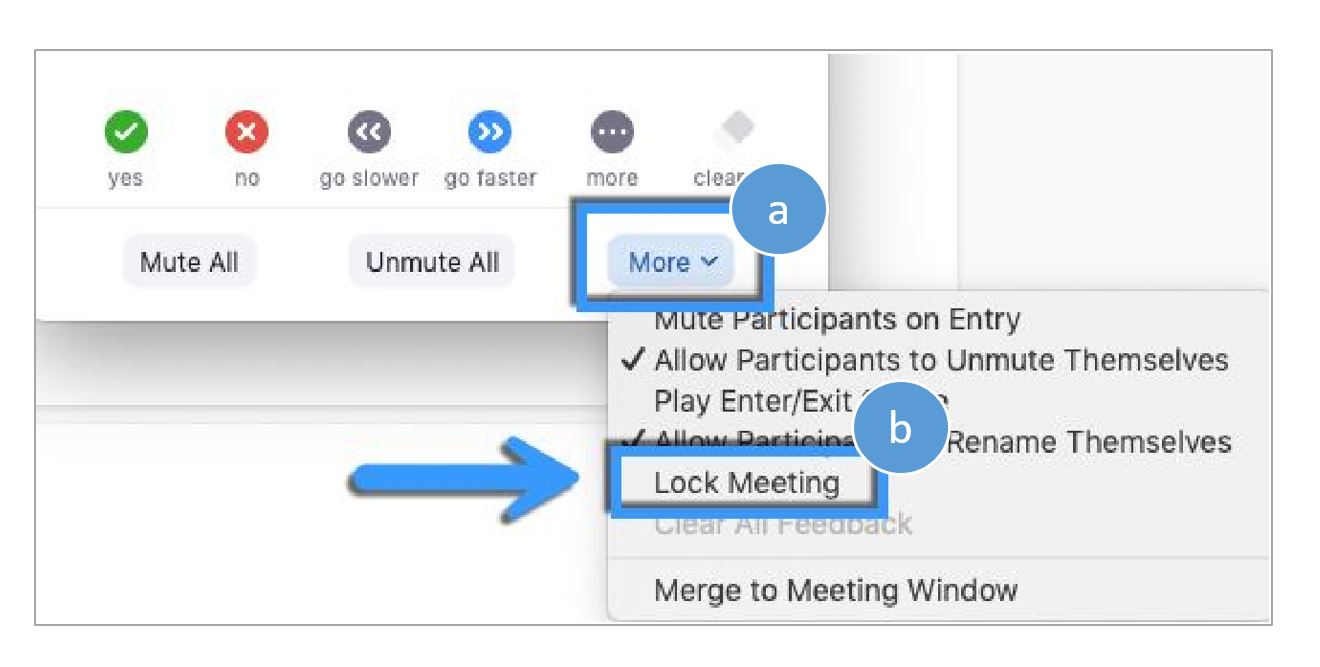
1. While in meeting session, click ‘Participants’ at the bottom of your Zoom window.

2. In the participants’ pop-up box, select (a) More and (b) Lock Meeting. When the meeting is locked, no new participants can join, even if they have the meeting ID and password.
Prevent Screensharing
- Zoom Screen Share Settings(Set up a user profile for all meetings.)
Zoom Screen Share Settings
Use the recommended screen sharing settings for your Zoom meetings to reduce Zoombombing.
- Visit stockton.zoom.us and click Log into your Profile
- Click

- Click

- Scroll down to the Screen sharing options and make the following selections.
- (a) Screen sharing: Activate
- (b) Who can share?: Host Only (With this selection you will be able to manually activate screen sharing for participants in a live Zoom call.)
- (c) Disable desktop/screen share for users: If you need to allow screen sharing during your Zoom meeting, you can change settings in the live meeting to allow screen sharing.
- (d) Annotation: Enable but following these guidelines:
- This feature can be used by Zoombombers to interrupt a meeting.
- Ensure that you use Waiting Rooms, allow participants into a meeting one-by-one, and be familiar with the steps to “Remove” a participant if needed.
- Annotation cannot be activated in a live meeting if it is disabled in Settings
- (e) Whiteboard: Enable and select auto save. Follow these guidelines.
- This feature can be used by Zoombombers to interrupt a meeting.
- Ensure that you use Waiting Rooms, allow participants into a meeting one-by-one, and be familiar with the steps to “Remove” a participant if needed.
- Whiteboard cannot be activated in a live meeting if it is disabled in Settings
- (f) Disable: Disable
- Visit stockton.zoom.us and click Log into your Profile
- Enable Screen Share for Participants(after meeting has started.)
Enable Screen Share for Participants
Follow the steps to allow participants to share their screen in a Zoom meeting when your default setting for participant screen sharing is disabled.
- Start you Zoom meeting in the Zoom app.
- Allow authorized participants into the meeting from the waiting room.
- Place your mouse in the Zoom meeting window. A bar will appear.
- Next to Share Screen, click:

Then "Advanced Sharing Options".
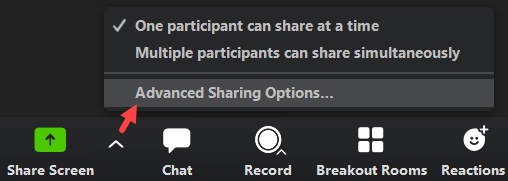
- On the pop-up screen, perform the following:
- (a) Select One participant can share at a time.
- (b) Select All Participants.
- (c) Select Only Host.
- (d) Click

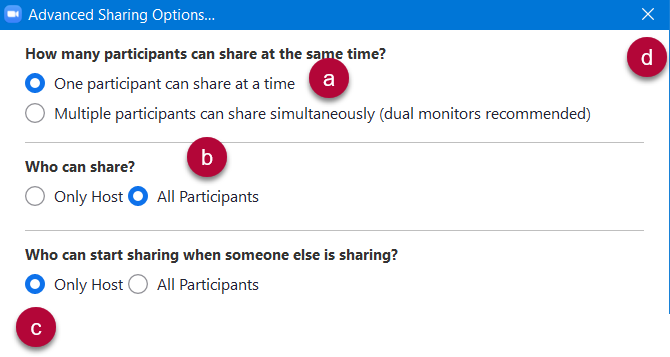
- Your participants will now be able to share your screens. As the host, you will be the only participant in the meeting who can start sharing while another person is sharing.
Set up a Waiting Room
- Enable a Waiting Room for a Zoom Meeting
Enable a Waiting Room for a Zoom Meeting
The Waiting Room feature allows the host to control when a participant joins the meeting. As the host, you can admit attendees one by one, or hold all attendees in the waiting room and admit them all at once.
Enable Waiting Room
- When scheduling the meeting, click

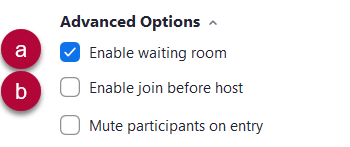
- Under Advanced Options:
- (a)Select Enable waiting room.
- (b)Ensure Enable join before host is not selected.
- When you have selected all other options, click

Start Meeting with Waiting Room
- Start your meeting from the Zoom app or from the Zoom meeting link in your calendar.
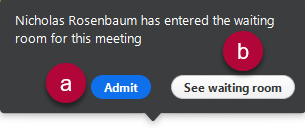
- As participants join the call, you will see a pop-up message:
- (a)To admit a person directly, click Admit and go to Step 7.
- (b)To see all participants in the waiting room, click See waiting room.
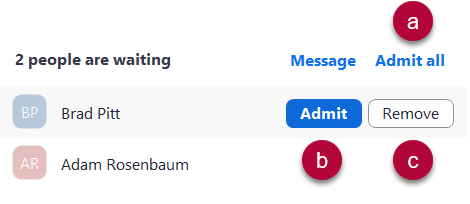
- In the waiting room panel, perform one of the following:
- (a)Click Admit All to admit all participants.
- (b)Click Admit to allow a single participant into the meeting.
- (c)Click Remove to remove a single participant from the Zoom meeting.
Managing a Meeting
Once the meeting has started, the meeting room is still active.
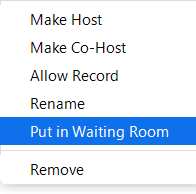
- If you wish to return a participant to the meeting room:
- Click More.

- Click Put in Waiting Room.
- Click More.
- If you wish to remove a participant from the meeting.
- Click More.

- Click Remove.
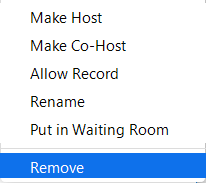
- Click More.
- When scheduling the meeting, click
- Waiting Room: Add or Remove Participants
Waiting Room: Add or Remove Participants
You have the following options when participants are in the Waiting Room. Note: It is not recommended that you use the Admit all feature as this may admit participants that should not be in your class.
- (a) Click Admit to allow a single participant into the meeting.
- (b) Click Remove to remove a single participant from the Zoom meeting.
Other Protective Measures
- Disable “File Transfer”
Disable “File Transfer”
- Go to stockton.zoom.us and choose "Log into your Profile"
- Click Settings
- Navigate to the File Transfer option on the Meeting tab and verify that the setting is disabled. If the setting is enabled, click the
Status toggle to disable it.
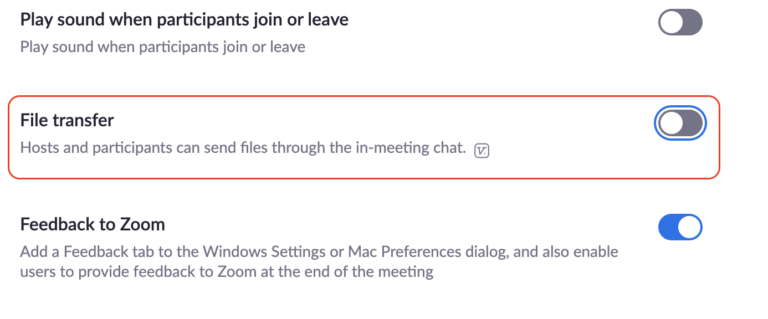
Note: If the option is grayed out, it has been locked at either the Group or Account level, and you will need to contact your Zoom administrator.
Limiting the File Types That Can be Shared
For security purposes, the file types/file extensions that can be shared via file transfer can be limited at the account level, by the account owner or an admin on the account.
- Sign into the Zoom web portal as an administrator with the privilege to edit account settings.
- Click Settings
- Navigate to the File Transfer option
- Enable Only allow specified file types.
- Enter the allowed file types/extensions, with a comma to separate each extension.
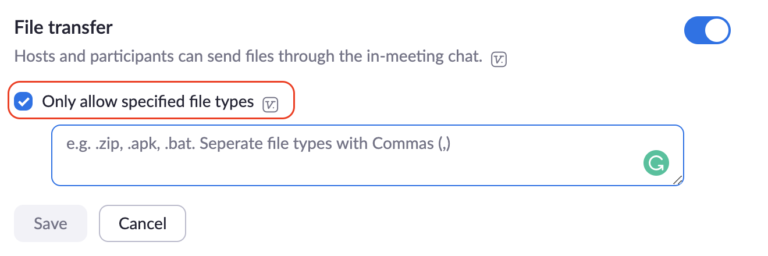
- Click Save.
- Disable Chat in a Zoom Meeting
Disable Chat in a Zoom Meeting
Follow the instructions to disable chat in a zoom meeting.
- In the Zoom meeting window, click Chat.
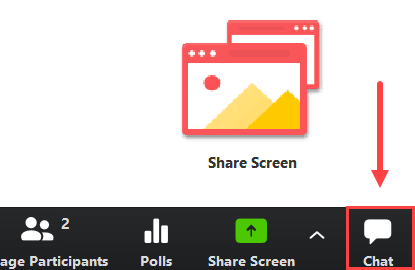
- In the Chat panel, click


- In the pop-up window, click No One to prevent participants from chatting in the meeting.
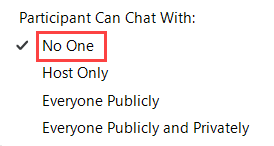
- In the Zoom meeting window, click Chat.
- Prevent Unauthorized Access
Prevent Unauthorized Access
- Go to stockton.zoom.us and choose "Log into your Profile"
- Click Settings
- Scroll down to “Only authenticated users can join meetings” and check the dial to enable the setting on your account.

4. When scheduling a meeting check the box “Only authenticated users can join” and from the drop down select your desired level of security
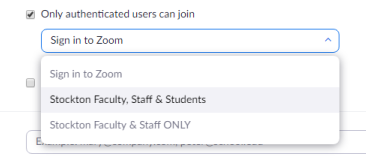
Sign in to zoom (Default): Allows anyone with a Zoom account to enter the meeting.
Stockton Faculty, Staff & Students: Allows anyone with a Stockton email address to enter the meeting (@go.stockton.edu & @stockton.edu).
Stockton Faculty & Staff ONLY: Allows anyone with an employee email address to enter the meeting (@stockton.edu).


