Training Tips
![]()
Hosting a Zoom Meeting in Blackboard
Stockton University will transition from Blackboard Collaborate to Zoom for video conferencing and online learning solution in August 2020. Zoom is a versatile web conferencing tool available free of charge to faculty and staff at Stockton University. If you need assistance with archiving an existing Collaborate session, please contact the Help Desk. If you need help with the pedagogical use of Zoom, please contact the Center for Learning Design. This guide will describe the process of embedding a Zoom meeting room into your Blackboard course section.
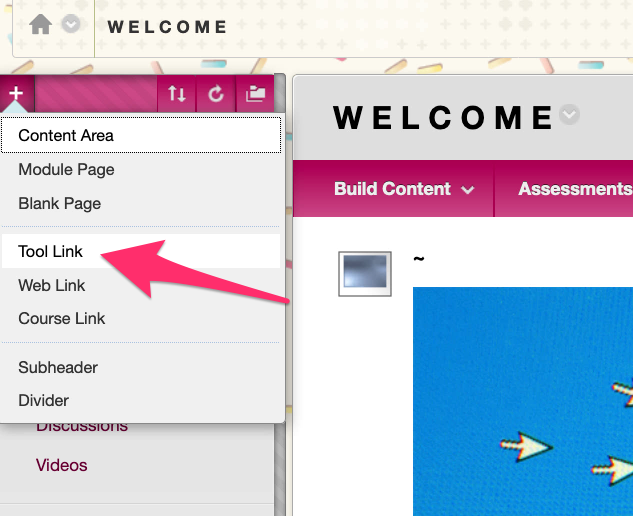
To begin, open up your web browser and navigate to your Blackboard course section. Click on the + icon at the top of the course navigation menu and select the option “Tool Link”.
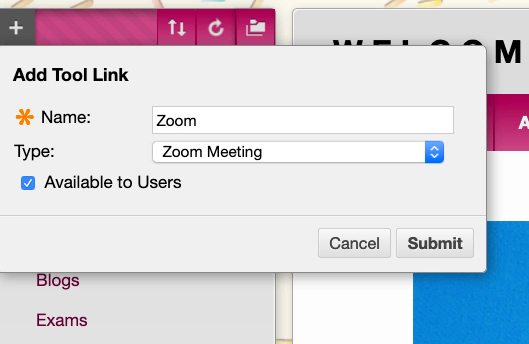
Next, give the new Tool Link a name (ex. “Zoom”), choose the tool type “Zoom Meeting” from the drop-drown menu, and check the box “Available to Users”.
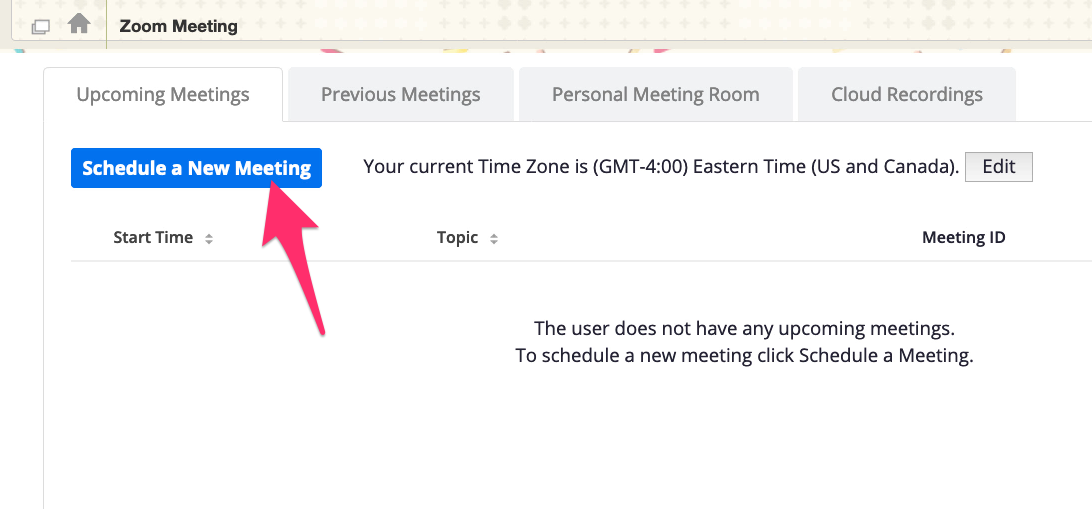
A new link will be available in your course menu, click on it to navigate to the Zoom tool. This interface may be familiar to those who have already logged into Zoom through the zoom.stockton.edu page. To create a Zoom meeting, click on “Schedule a New Meeting”.
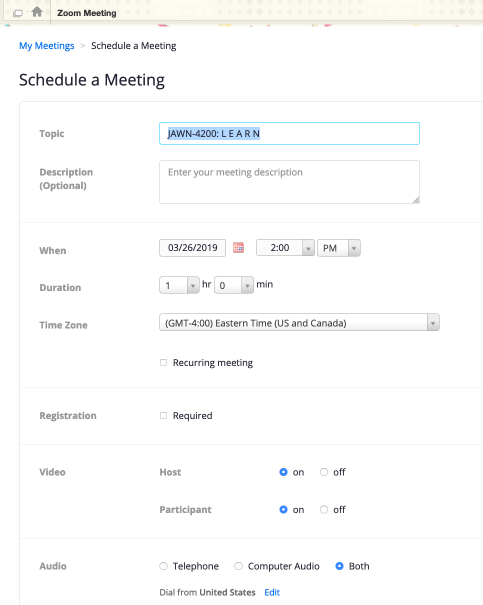
Give your Zoom meeting a topic that matches its purpose, then modify any necessary date and time settings. To finalize the meeting, scroll down and click “Save”.
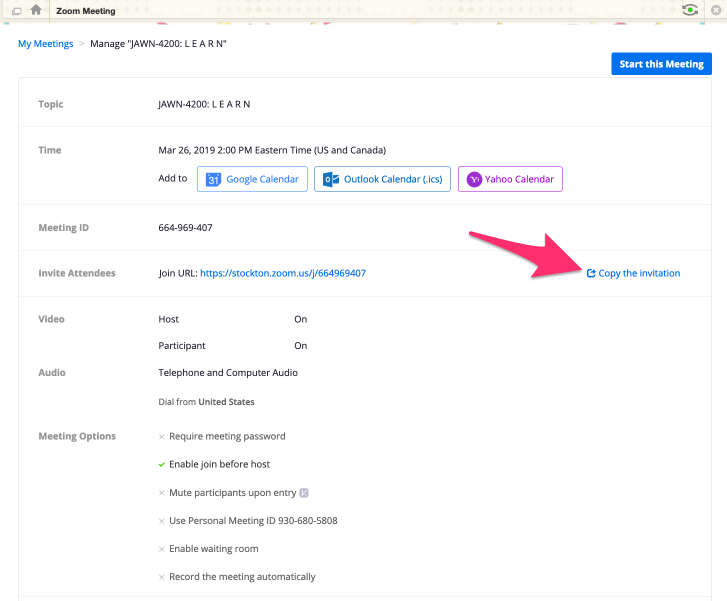
To invite students and guests to the meeting, click on “Copy the Invitation” to generate a complete e-mail template with all relevant meeting details. This template can be pasted into an e-mail or Blackboard announcement for distribution.
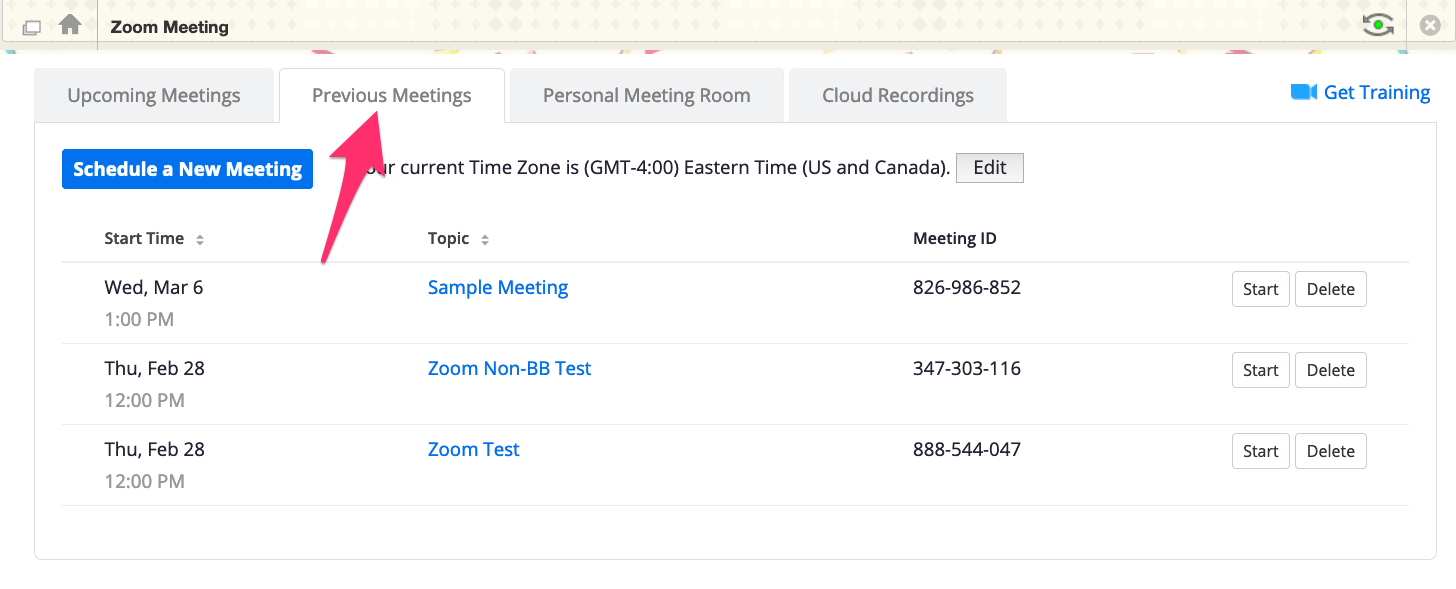
Back in the main menu, there are two useful tabs that bear mentioning: “Previous Meetings”, which encompasses all previous meetings attached to your account...
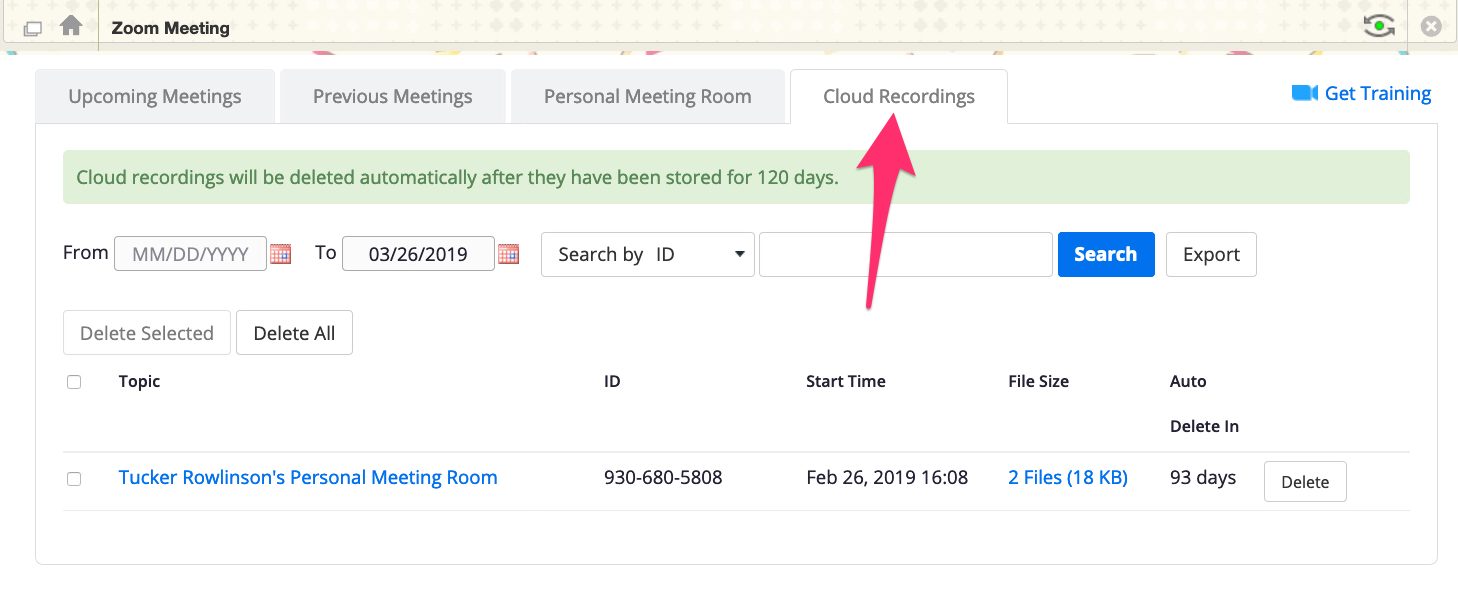
You will also find “Cloud Recordings” where meeting recordings are stored and can be downloaded for 120 days.
For additional information on Zoom, check out Zoom’s online help center.

